Tips, Recipes, Natural Cleaners, Home decorating projects and Tales from my life.
Wednesday, November 16, 2011
Natural Hand Sanitizer
There's a young 'un that lives in my house that likes hand sanitizer. I mean, he really likes it. Let's just be honest. He loves the stuff. When he would spend the night at his Mamaw's house when he was little they would inevitably end up at the mall at a certain shop that is known for it's lotions, potions and all things that smell good. He would always come home with 3 bottles of the kid's scented hand sanitizers. I didn't really like how much of the stuff he'd use, but I didn't really understand the dangers of it at that time, either. I now know that there are ingredients in hand sanitizer that we want to steer clear of, for the most part. Nasty ingredients that promote antibiotic resistance. Not only that, but this certain child who lives in my home has really sensitive skin. Especially his hands. For this reason, I try to keep the use of hand sanitizer only to times when it's not possible to get to soap and water.
However, sometimes this little person in my house is able to get his hands on some. They were giving it away at the chiropractors' office few weeks ago. I kept hearing a spraying sound and smelled something while we were in the car. "Isaac what are you doing?" "Cleaning the car seat." "With what?" "Hand sanitizer." I then proceeded to take it away from him and explain to him (once again) the reason that we only use it when we can't get to soap and water. That it's not made for cleaning things. It's made to kill germs on your hands. He then apologized. Fast forward a couple of weeks. We're at home and he comes out of his bedroom smelling like vanilla. "Let me smell your hands." I sniff. "Have you been using hand sanitizer?" I vaguely remember seeing a small bottle floating around somewhere. To which he replies, "I was cleaning my arrow heads with it." "First of all, you don't use it to clean arrow heads. You don't use it to clean anything. It's for your hands. Secondly, I thought I told you I didn't want you using it unless you can't get to soap and water? Where did you get that anyhow?" To which he responded that he was once again sorry and that while he was having a sleep-over with his mamaw they ended up at the mall in a certain shop that is known for it's lotions, potion and all things that smell good. Unbeknownst to me, he bought the hand sanitizer with his allowance. I (once again) made him hand the defender over and told him (and his mamaw) that he was not allowed to buy hand sanitizer. The child just can't help himself. I realize that. I also realized that I needed to try to come up with a better alternative for those times that we really need to de-germ. So, I set out to make a natural hand sanitizer. I used 4 ingredients and combined them in a sample sized spray bottle.
My base was witch hazel. It is very inexpensive and can be found in any drug or grocery store. This stuff is amazing and I always have it on hand. According to www.herbs2000.com, it is an herb that is usually found as a liquid tincture and is known to be helpful in healing inflammation of the skin, sunburns, insect bites and stings, scratches and bruises. It has many more wonderful properties, but these uses were enough for me to determine that it would make a sufficient base for my hand sanitizer.
Next, I added about 10 drops of lavender essential oil. I love the smell of lavender, but I added it because it is anti-bacterial. It's also wonderful to add to your homemade cleaners because of this reason. See www.aromaweb.com for more information on lavender essential oil. I also added about 10 drops tea tree oil, which is antiseptic, anti-microbial and germicidal, also according to www.herbs2000.com.
The last thing I added was just about 1/4 - 1/2 tsp. of grapeseed oil to help act as a carrier for the essential oils and to off-set any potentially drying effects of the hand sanitizer. Olive or jojoba oil would work really well, also.
I made sure that I had enough room to add my oil and essential oils then finished filling my spray bottle with the witch hazel. I just make sure to give it a good shake to mix everything up before applying it.
I'm no doctor or herbalist, but with the few things I've learned about the essential oils, I'm thinking that my new hand sanitizer should get the job done without the scary effects of industrial hand sanitizers should a certain little someone in my home not be able to resist the urge to break into the hand sanitizer again. :0)
I'm linking this post to Frugal Days Sustainable Ways blog hop, Your Green Resources, Simple Lives Thursday, The Homestead Barn Hop and Living Well blog hop.
Tuesday, November 15, 2011
Water Kefir Questions and Recipes
Regular and flavored kefir brewing at different stages.
In yesterday's post I shared how to make water kefir. There were a couple of questions that came up that I thought I'd clarify and then I'll share some of our favorite ways to drink it.
First of all, water kefir is gluten-free. So, if you have an issue with gluten, water kefir won't be an issue for you. Secondly, there was a question about the second ferment. After you strain out your kefir grains, you use those to start a new batch. The second ferment takes place without the grains in the liquid. Although there are no actual grains in the brew, there are still plenty of active organisms ready to get to work on the juice or fruit you add. I hope this clarifies things a little.
You don't have to do a second ferment for your water kefir to be ready to drink. I just like when it gets all fizzy. :0) Also, there are probably a blooming gazillion ways to flavor water kefir. I'm simply going to share a few that have become our favorites, so far. Ready?
First Ferment:
1. Cream Soda - Add 2 - 3 tsps. of vanilla extract per quart of kefir. That's it!
2. Lemonade - Add 1/4 cup of lemon juice per quart of kefir. I tried this with bottled lemon juice. It was good, but a little tart. I think that the juice from a real lemon would be even better. Makes me kind of wish for my old Meyer Lemon tree from our days living in Florida. :0)
3. Juiced-Up Kefir - Add an equal amount of your favorite juice to the water kefir. You can also add sparkling water to fizz it up.
Second Ferment:
This is where your options get really wide. Note that if you go this route you'll want to seal your container (glass please) instead of covering it with cheese cloth or a coffee filter. Sealing it off is what will cause it to become naturally carbonated or fizzy. I have been using quart or half gallon canning jars because that's what I have. But, these Grolsch flip-top style bottles are on my wish list because they are supposed to be superb at capturing the excreted gas that gives it all the fizzy goodness.
Method 1: Add fresh or dried fruit to the kefir after it has been strained. Some really great options are apple or cranberry. Or apple and cranberry. There is also apricot, mango, or whatever your favorite is. This method can ferment anywhere from an additional 1 to 7 days. Just make sure that you change out fresh fruit every day. Dried fruit can ferment with your kefir for up to a week...if it's around that long.
Method 2: Add 1 part 100% fruit juice to 3 parts water kefir. Let it sit at room temperature for several days before refrigerating. Refrigeration will cause the fermentation process to stop. I also have successfully used equal parts juice and kefir and let it ferment all day or overnight and it gets a lovely fizz to it. Some of our favorites have been made with grape, cranberry, or cranberry pomegranate juice. Isaac's favorite is made with orange juice. When you're ready to drink it, add a dash of vanilla extract for an orange cream soda style drink.
Well, I hope that you're a little more inspired to start experimenting with the endless possibilities of water kefir!
Sunday, November 13, 2011
Water Kefir
When you make a decision to quit drinking soda and things like Kool-Aid or other sugary drinks, it cuts your beverage options way back. That's where my family has found itself. We've basically been drinking water, un-sweet tea or milk, which I don't particularly care for. Well, I have recently found a solution that not only tastes good, but that is really healthful, too. Enter water kefir...
I'll save the technical jargon on what kefir grains are exactly and just share some of the benefits of drinking kefir water.
According to ezinearticles.com:
I'll save the technical jargon on what kefir grains are exactly and just share some of the benefits of drinking kefir water.
According to ezinearticles.com:
Kefir drink has been known to help in the cure of back pain, neck pain and diverticulitis. It is also believed to help in the detoxification of the intestinal and removal of intestinal parasites. The healthy drink is also known to lower the blood pressure levels and reduce the risk of cardiac arrest by over 30% in mid aged folks.
The drink has been used by athletes to tone their bodies using the folic acid contained in the mixture to improve their circulation and blood pressure. The kefir diet is also used by Yoga trainers and it is also known as the Yoga Masters diet, Jesus diet, vegans diet and marathoners diet. It is true that many people that are serious in their health have used or still continue to use kefir drink as their number one choice in refreshment and healthy drinks.
According to yourkefirsource.com:
Over the years while studying and experimenting on kefir and kefir grains, I have compiled a list of the known benefits that kefir may be able to cure.
Kefir, the miracle food, is known as a superb probiotic source. With rich probiotic content, it automatically has a positive effect on our bodies. Kefir and Kefir grains have been around for centuries and centuries back, and all for a good reason.
I have personally seen many of these health benefits throughout the years and I really do hope it helps you too.
Here are some of the known kefir health benefits:
- Strongest natural remedy against any allergy
- Strongest natural antibiotic without side effects
- Treats liver disease
- Treats gallbladder, dissolves gall bladder stones
- Clears the body of salts, heavy metals, radionuclides, and alcoholic products
- Cleans the body of chemical antibiotics
- Treats kidney stones
- Good bacteria in kefir are able to fight off pathogenic microorganisms
- Lowers level of LDL cholesterol
- Cleans the gastrointestinal tract
- Irritable Bowel Syndrome
- Treats gastritis
- Treats pancreatitis
- Treats ulcers
- Prevents and treats colon cancer
- Improves digestion
- Improves the body functions
- Improves the human immune system
- Cures Candida
- Cures hypertension
- Stops growth of cancer cells
- Speeds up healing process
- Treats psoriasis
- Treats eczema
- Treats inflammatory diseases
- Reduces size of tumors
- Treats heart disease
- Reverses calcination of blood vessels
- Clears the blood vessels
- Boosts the bodies energy
- Natural “feel good” food
- Treats lung infections
- Normalizes metabolism thereby can be used as for weight loss
- Cures acne
- Has anti-oxidants and anti-aging properties
- Nourishes hair
- Treats the gum disease parodontosis
- Lessens effects of medicines
- Replenishes body of good bacteria after antibiotic
- Balances the microflora of the body’s digestive system
- Regulates blood pressure
- Lowers blood sugar
- Lowers blood lipid levels or cholesterol and fatty acids
- Treats diarrhea
- Treats constipation
- Promotes bowel movement
- Anti-stress properties
- Treats sleeping disorders
- Treats depression
- Treats attention deficit hyperactivity disorder
- Improves the brains neuro functions like reflexes, memory retention, attention, the five senses
- Reduces flatulence
- Lactic acid fermentation enhances the digestibility of milk based foods. People who cannot otherwise digest milk, can enjoy the vital calcium rich Kefir.
- Treats yeast infection
- Eliminates vaginal odors
- Cures wrinkles
- Treats arthritis
- Treats colitis
- Treats gout
- Cures migranes
- Treats rheumatism
- Treats other stomach disorders
- Detoxifies the body
- Improves protein quality of milk, and enhances absorption and digestion
- Good bacteria manufacture B vitamins such as B3, B6 and folic acid.
- Aids in treating tuberculosis
- Treats stomach cramps
- Treats chronic intestine infections
- Treats liver infections
- Treats asthma
- Treats bronchitis
- Treats sclerosis
- Treats anemia
- Treats hepatitis
- Healing effects on catarrh, digestive nodes, astral nodes, bilious complaints
- Treats leaky gut syndrome
- Prevents metastasis
- Cures bad morning breath
These are but some of the known kefir health benefits.
So, now that you have an idea why it's so good for you, I'll show you how to make it. K?
First, you have to start with kefir grains. There are kefir grains for water and for milk, so you need to make sure you have the right kind. They look like clear, little, bumpy balls of jelly.
I bought my grains from Cultures for Health and they came dehydrated. There were easy instructions to rehydrate the grains. You can also buy your grains from other sellers on the internet, or get extras from a friends. Once the grains were rehydrated, the fun stuff began.
To make a quart of water kefir, you first dissolve 1/4-1/3 cup of sugar in water. There are a few caveats here. First, the water can't be chlorinated. So, if you're going to use tap water you either need to let it set overnight so the chlorine can evaporate, or you can run the water in the blender and do the same thing. Next is the sugar issue. It is best to use organic because kefir grains are living organisms. I use organic Sucanat or Rapadura because it also has minerals in it. But, I started out with plain old white table sugar. Anyway, after you dissolve the sugar in the water, fill the quart container almost to the top with more water. When it is room temperature, add your kefir grains. Then top the container with a coffee filter or cheese cloth secured with a rubber band.
Allow it to sit for 24 hours, then strain the grains out. Now the kefir can be flavored. You can drink it now and add juice or vanilla extract to make cream soda. Or, and this is my favorite, you can add fruit or juice and let it ferment again. It will become carbonated and be an excellent replacement for soda.
The kefir on the left is ready for it's first ferment. It is a dark color because of the color of the Sucanat. You can see on the right that the color is much lighter after the first ferment. That's because the bacteria and yeast have eaten the sugars. You can also see the cranberries on the bottom of the right jar flavoring the second ferment.
One of the most awesome things about making kefir and drinking it at home is that you don't need new kefir grains for each batch. Not only are they are reusable - they will multiply, allowing you to increase the amount of kefir you make or share them with someone you love. <3 I've only had my grains going a couple of weeks and have already been able to spread the love.
So, the moral of the story is this: if you want to ditch the soda, get hooked on water kefir. :0)
For more detailed recipes see this post.
I'm linking up with: Homestead Barn Hop, Real Food 101, Monday Mania, Hearth and Soul Blog Hop, Traditional Tuesdays, Teach Me Tuesdays, Fat Tuesday, Frugal Days Sustainable Ways blog hop, Healthy 2day Wednesdays and Simple Lives Thursday.
For more detailed recipes see this post.
I'm linking up with: Homestead Barn Hop, Real Food 101, Monday Mania, Hearth and Soul Blog Hop, Traditional Tuesdays, Teach Me Tuesdays, Fat Tuesday, Frugal Days Sustainable Ways blog hop, Healthy 2day Wednesdays and Simple Lives Thursday.
Wednesday, November 9, 2011
Chinese Food Inspiration
Yesterday's post about bean sprouts raised a couple of questions so I thought I'd tackle them today.
Penny has a great blog, Penniless Parenting, that has all kinds of frugal tips. I read it every day. Anyway, Penny mentioned that whenever she has sprouted beans in the past they haven't been as fat and straight as the kind in the grocery store. Also, she found them to be bitter and wondered if I found them to be bitter as well.
First of all, the sprouts I make at home are not as fat as they are in the grocery store. I don't really know why that is. Maybe they use fertilizer on their beans or use a hybrid or something. These are guesses because I honestly have no idea why that is. It doesn't bother me that they're skinnier sprouts, though. As far as the taste goes, I haven't noticed them being bitter at all. Granted, I don't eat them raw. I don't know if that would make a difference or not. So basically, I don't really have any solid answers to Penny's questions. LOL. Hopefully this helps a little, though.
Jessie is my real life dearest friend and has a wonderfully inspiring blog, Overflow of a Forgiven Soul. She's the whole reason I started a blog. :0)
Jessie said she has never made Chinese food at home and is looking for some inspiration complete with meal plan and recipes.
Usually, I make a main dish and rice. I usually just make regular old rice (Basmati or Jasmine), but occasionally I'll make it fried. In my pre-gluten-free days I'd make egg rolls, too, if I was really feeling froggy.
I thought the best thing to do is to link to some of our favorite recipes. So here goes...
Sides: These are not gluten-free, but they're really good. :0)
Won Ton Soup
Egg Rolls
Main Dishes:
Garlic Chicken - This is a fabulous crock pot meal!
P.F. Chang style Lettuce Wraps - Very yummy!
Chow Mein - This is our favorite. Oh, the flavors are wonderful! This is also a crock pot meal.
General Tso's Chicken - I haven't actually tried this one, but have it bookmarked for the future.
If you're not gluten-free recipes aren't an issue. A few things that I've found to change a regular recipe to g-free is to use g-free soy sauce (I use San-J), and to use g-free all-purpose flour to coat meat that needs to be fried first instead of regular flour. Also, the chow mein recipe calls for noodles. I used g-free noodles the first time I made it, but they didn't swell hardly at all like regular pasta does when I boiled it. It seemed like two boxes of pasta would be more appropriate, but that could be very expensive since g-free is known to carry a pretty hefty price tag. So, I've switched from using noodles for our chow mein to making it with rice. I know it isn't authentic, but it's still delicious. :0)
So, there you have it. A few links to Chinese food faves. I'm sure there are a ton more out there since I've barely scratched the surface. If you have a favorite Chinese fake-out recipe, feel free to share it or leave a link in the comments. Now go, be inspired to get your Asian on!
Penny has a great blog, Penniless Parenting, that has all kinds of frugal tips. I read it every day. Anyway, Penny mentioned that whenever she has sprouted beans in the past they haven't been as fat and straight as the kind in the grocery store. Also, she found them to be bitter and wondered if I found them to be bitter as well.
First of all, the sprouts I make at home are not as fat as they are in the grocery store. I don't really know why that is. Maybe they use fertilizer on their beans or use a hybrid or something. These are guesses because I honestly have no idea why that is. It doesn't bother me that they're skinnier sprouts, though. As far as the taste goes, I haven't noticed them being bitter at all. Granted, I don't eat them raw. I don't know if that would make a difference or not. So basically, I don't really have any solid answers to Penny's questions. LOL. Hopefully this helps a little, though.
Jessie is my real life dearest friend and has a wonderfully inspiring blog, Overflow of a Forgiven Soul. She's the whole reason I started a blog. :0)
Jessie said she has never made Chinese food at home and is looking for some inspiration complete with meal plan and recipes.
Usually, I make a main dish and rice. I usually just make regular old rice (Basmati or Jasmine), but occasionally I'll make it fried. In my pre-gluten-free days I'd make egg rolls, too, if I was really feeling froggy.
I thought the best thing to do is to link to some of our favorite recipes. So here goes...
Sides: These are not gluten-free, but they're really good. :0)
Won Ton Soup
Egg Rolls
Main Dishes:
Garlic Chicken - This is a fabulous crock pot meal!
P.F. Chang style Lettuce Wraps - Very yummy!
Chow Mein - This is our favorite. Oh, the flavors are wonderful! This is also a crock pot meal.
General Tso's Chicken - I haven't actually tried this one, but have it bookmarked for the future.
If you're not gluten-free recipes aren't an issue. A few things that I've found to change a regular recipe to g-free is to use g-free soy sauce (I use San-J), and to use g-free all-purpose flour to coat meat that needs to be fried first instead of regular flour. Also, the chow mein recipe calls for noodles. I used g-free noodles the first time I made it, but they didn't swell hardly at all like regular pasta does when I boiled it. It seemed like two boxes of pasta would be more appropriate, but that could be very expensive since g-free is known to carry a pretty hefty price tag. So, I've switched from using noodles for our chow mein to making it with rice. I know it isn't authentic, but it's still delicious. :0)
So, there you have it. A few links to Chinese food faves. I'm sure there are a ton more out there since I've barely scratched the surface. If you have a favorite Chinese fake-out recipe, feel free to share it or leave a link in the comments. Now go, be inspired to get your Asian on!
Tuesday, November 8, 2011
Growing Bean Sprouts
My family really likes Chinese food. I mean, YUM! We could eat it every week. The only problem is that unless specifically stated that they don't use it, most Chinese restaurants load up their food with MSG. Yes, that's another word for GLUTEN. Of which I can not have.
I may or may not have mentioned that my doctor doesn't want me to eat the stuff. I obliged her happily at first. Then, I began to cheat. Just a little. However, after having a headache every single day for 2 weeks the light began to shine through the small cracks in my thick cranium and I realized that the gluten could be causing my headaches. As soon as I cut out all gluten again, the headaches went away. Yes, I'm a slow learner. I never claimed to be the sharpest knife in the drawer. But I digress... Back to the Chinese food.
Since we love Chinese food and Chinese restaurants are out of the question, I'm learning to make it at home. This is where my tip comes in. Since bean sprouts are a staple in Chinese cuisine, I've learned how to have them on hand as frugally as possible. I sprout my own. Want to learn how to sprout some, too? It's stupid easy.
First you need beans. Not any will do. You need Mung beans. I found mine in the bulk isle at Whole Foods. This is what they look like.
Put 2 tablespoons of Mung beans in a quart sized mason jar and cover with a little bit of water. Let it set over night.
The next morning, drain off the water, then cover with a piece of cheese cloth secured with a rubber band. A coffee filter with may even work. Just make sure it's something that will let the excess water drain off of the beans. Place your jar upside down inside of a bowl. Remember, you want the excess water to drain off.
Now cover it with a towel so that it's nice and dark in there for your beans to do their thang. They like privacy.
The following morning you should see little tiny tails sprouting from your beans.
Rinse them, put the cheese cloth back on, put upside down in your bowl and re-cover with your towel. Repeat this process every day. You'll be amazed at how quickly they grow.
After about 5 days or so they'll be ready and will have filled your quart sized jar.
There really is nothing to growing your own bean sprouts other than giving them a quick rinse every morning, which takes all of 30 seconds.
Now for the frugal break down. A pack of fresh bean sprouts costs $1.50 at my local supermarket. It is probably about as much as I just grew in this quart jar, maybe a little less. When I bought my Mung beans, I just grabbed a portion of a scoop full. Not very many. They cost me all of $.83. I have gotten 5 batches of bean sprouts out of that small scoop. That breaks down to $.17 per batch of sprouts. That's a savings of $1.33 per batch. Here's another way to look at the savings. If I made Chinese food at home five times, I would spend $7.50 on the bean sprouts alone, not including the other ingredients. Or, I could sprout my own and spend $.83 for savings of $6.67. I like the math on that. :0)
The only thing about growing your own bean sprouts is that you have to slightly plan ahead. Just know that if you start bean sprouts this week you need to plan on making Chinese food one day next week. Not too hard, huh? Hope this has inspired you to start growing your own bean sprouts. And just think how cool your kids will think this is!
I'm linking up with other bloggers at Teach Me Tuesdays, Traditional Tuesdays, Real Food 101, Fat Tuesday, This Chick Cooks, Simple Lives Thursday and Hearth and Soul Blog Hop.
I may or may not have mentioned that my doctor doesn't want me to eat the stuff. I obliged her happily at first. Then, I began to cheat. Just a little. However, after having a headache every single day for 2 weeks the light began to shine through the small cracks in my thick cranium and I realized that the gluten could be causing my headaches. As soon as I cut out all gluten again, the headaches went away. Yes, I'm a slow learner. I never claimed to be the sharpest knife in the drawer. But I digress... Back to the Chinese food.
Since we love Chinese food and Chinese restaurants are out of the question, I'm learning to make it at home. This is where my tip comes in. Since bean sprouts are a staple in Chinese cuisine, I've learned how to have them on hand as frugally as possible. I sprout my own. Want to learn how to sprout some, too? It's stupid easy.
First you need beans. Not any will do. You need Mung beans. I found mine in the bulk isle at Whole Foods. This is what they look like.
Put 2 tablespoons of Mung beans in a quart sized mason jar and cover with a little bit of water. Let it set over night.
The next morning, drain off the water, then cover with a piece of cheese cloth secured with a rubber band. A coffee filter with may even work. Just make sure it's something that will let the excess water drain off of the beans. Place your jar upside down inside of a bowl. Remember, you want the excess water to drain off.
Now cover it with a towel so that it's nice and dark in there for your beans to do their thang. They like privacy.
The following morning you should see little tiny tails sprouting from your beans.
Rinse them, put the cheese cloth back on, put upside down in your bowl and re-cover with your towel. Repeat this process every day. You'll be amazed at how quickly they grow.
After about 5 days or so they'll be ready and will have filled your quart sized jar.
There really is nothing to growing your own bean sprouts other than giving them a quick rinse every morning, which takes all of 30 seconds.
Now for the frugal break down. A pack of fresh bean sprouts costs $1.50 at my local supermarket. It is probably about as much as I just grew in this quart jar, maybe a little less. When I bought my Mung beans, I just grabbed a portion of a scoop full. Not very many. They cost me all of $.83. I have gotten 5 batches of bean sprouts out of that small scoop. That breaks down to $.17 per batch of sprouts. That's a savings of $1.33 per batch. Here's another way to look at the savings. If I made Chinese food at home five times, I would spend $7.50 on the bean sprouts alone, not including the other ingredients. Or, I could sprout my own and spend $.83 for savings of $6.67. I like the math on that. :0)
The only thing about growing your own bean sprouts is that you have to slightly plan ahead. Just know that if you start bean sprouts this week you need to plan on making Chinese food one day next week. Not too hard, huh? Hope this has inspired you to start growing your own bean sprouts. And just think how cool your kids will think this is!
I'm linking up with other bloggers at Teach Me Tuesdays, Traditional Tuesdays, Real Food 101, Fat Tuesday, This Chick Cooks, Simple Lives Thursday and Hearth and Soul Blog Hop.
Thursday, November 3, 2011
Lemon Balm Tea
In yesterday's post I mentioned a few of the ways that I use my herbs. Today I want to share one of those ways with you. I'm going to show you how I make lemon balm tea.
First, let me share a bit about lemon balm with you. This excerpt is taken from the e-book "Healing Herbs" by Rosalee de la Foret.
Lemon balm is a highly aromatic plant that is easy to grow in your garden. Like many mints it has a variety of uses and is generally safe for all ages. It also tastes wonderful, making it an easy remedy to get down picky throats.
Children seeking comfort from the pain of teething can use lemon balm as a tea or can chew on a washcloth soaked in tea.
Like many mints it is an aromatic digestant that can be used for indigestion, gas, bloating, and other digestive complaints.
Lemon balm is antiviral and a relaxing diaphoretic, making it an ideal choice for colds and the flu, especially when accompanied by a fever. It is often combined with St. John’s Wort, both topically and internally, to relieve cold sores. Because both of these antiviral herbs are relaxing nervines they make an especially beneficial pairing for these stress-related sores.
Lemon balm’s calming abilities are especially suited for tissues in an excited state such as hyperthyroidism. It is often paired with bugleweed (Lycopus spp.) and motherwort (Leonorus cardiacus) for hyperthyroid conditions with heart palpitations. Because it is often used for hyperthyroidism, some caution those with a hypothyroid from using too much of it.
If you’re feeling overly stressed with a go-go-go-go mentality, a daily lemon balm infusion can help you to slow down and unwind. I like to pick lemon balm just before it flowers, which is usually when the temperatures are nice and toasty outside.
Ok, now for my disclaimer. I love lemon balm. But, as you just read it is a part of the mint family. In case you don't know what that means - IT IS VERY INVASIVE. I actually have spearmint growing as well, and lemon balm makes spearmint look like a wussy in regards to it's invasive tendencies. I knew nothing about it when I planted it other than Isaac thought it would be good to have. Note here - research before you go planting something you know nothing about. That one little lemon balm plant that we put in the front flower bed has sent runners under the ground all the way into the back yard. It wants to take over everything. Having said that, I would still grow it, I would just grow it in a pot or in a separate bed with deep boundaries to keep it in one spot. Hind sight's 20/20...
So, here's my favorite way to use this lemony herb of goodness.
Pick (or cut) your lemon balm and wash it in cool water.
Stuff it into a quart sized mason jar while twisting and bruising the leaves. There is no need pick the leaves from the stems.
Next, fill the jar with boiling water to cover the lemon balm. Then, press and crush the leaves with a wooden spoon.
Once the leaves have been crushed, cap the jars and wait for them to completely cool.
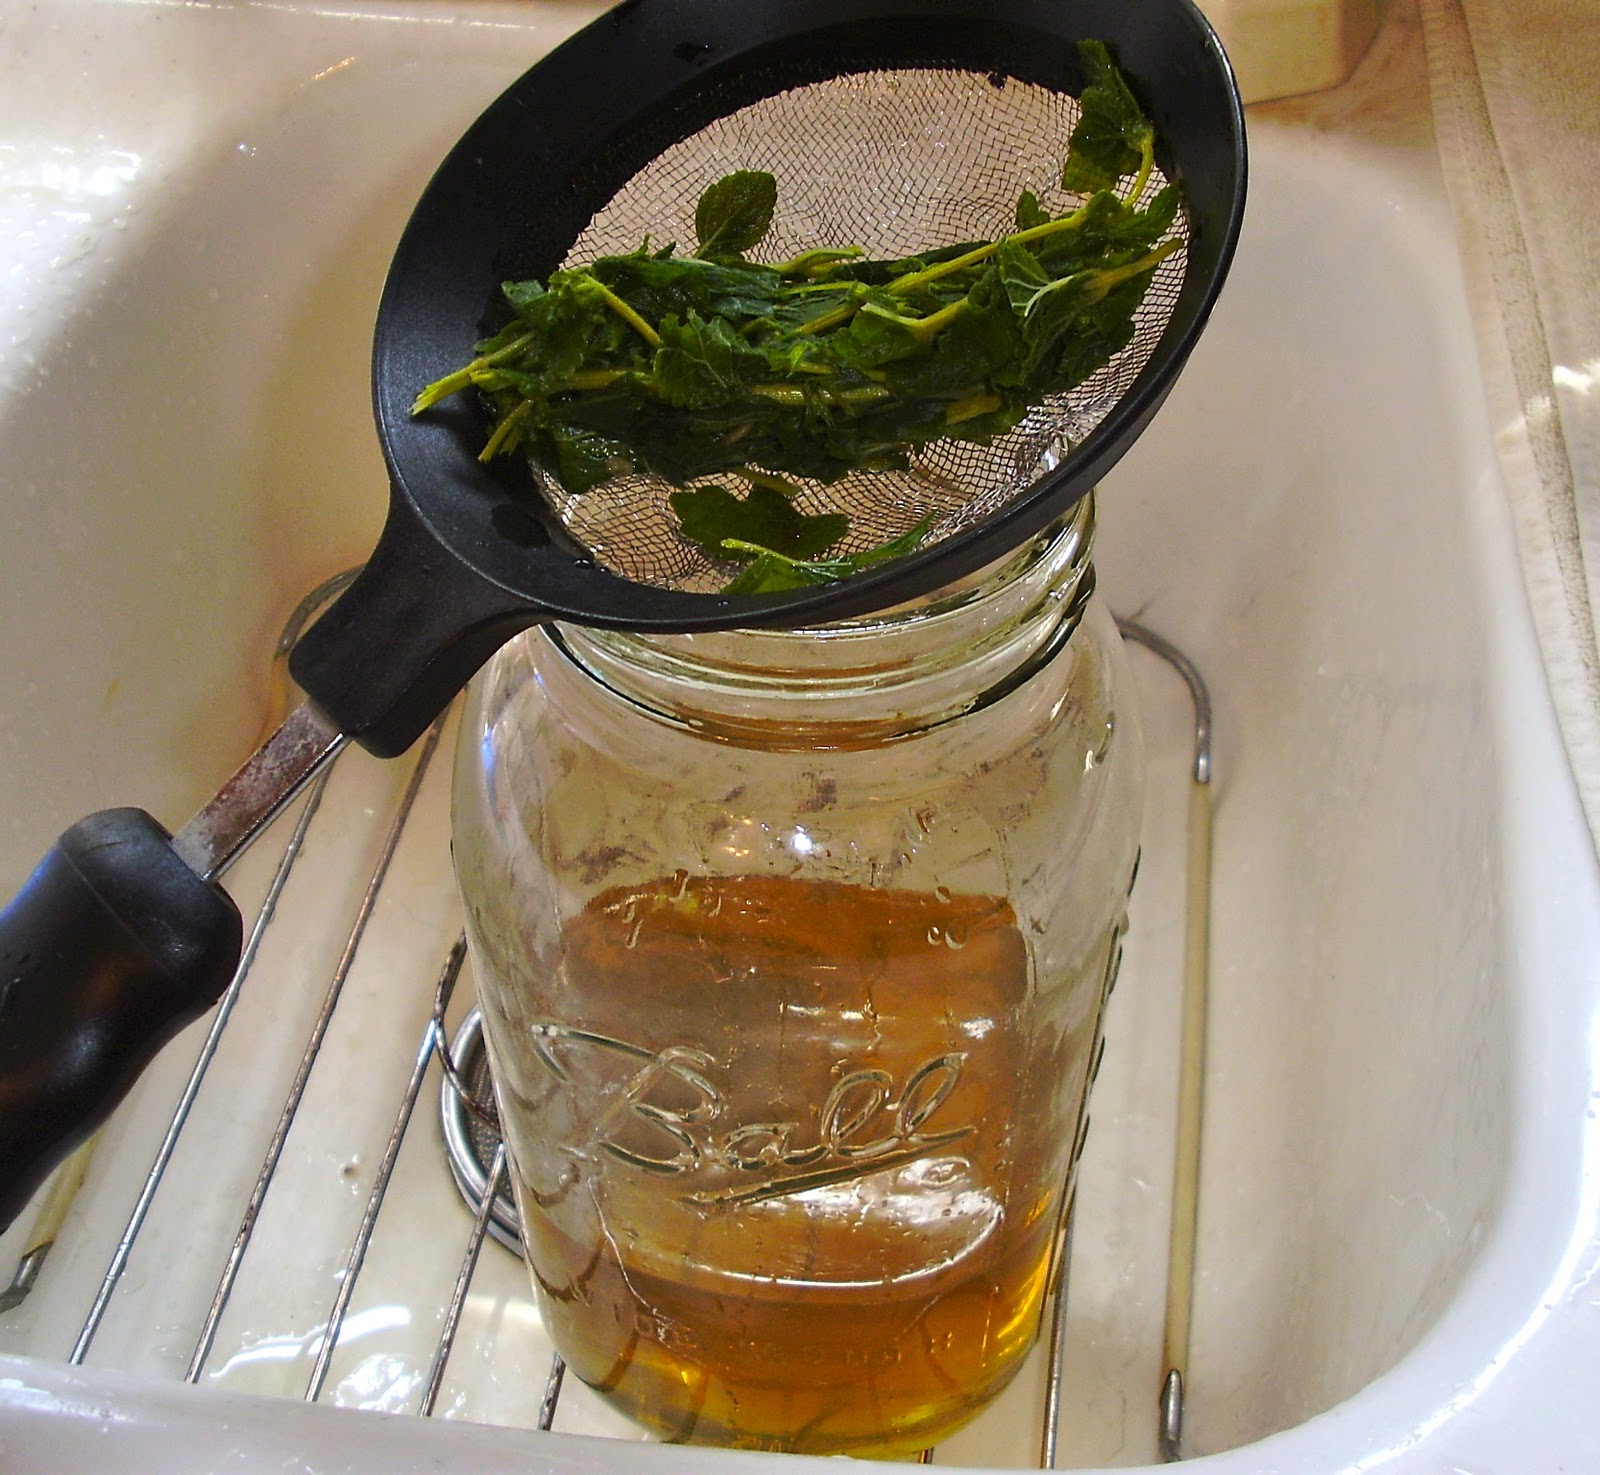
After the tea has cooled, strain it into a different container. I strained my quart jars into a half gallon mason jar, but you can use a pitcher or anything you have on hand.
The tea you now have is very concentrated. You want to dilute it by at least half. In this case, I poured the tea off of my quart sized jar into a half gallon container and finished filling it up with cold water.
It's a matter of taste at this point. You may like your tea a little weaker. Depending on how strong my first batch of tea is, I may dilute it by thirds or even quarters.
You can add a little honey or simple syrup it you like it sweet. Or if you really want to play up the lemony flavor, you can add an extra dash of lemon juice.
With the rest of the tea concentrate I had left, I poured enough concentrate to make a half gallon of tea at a time into freezer bags and popped them in the freezer for a quick way to make tea each time I had a hankering for some. Just make sure you don't skimp on quality bags for this like I did. They leak everywhere leaving all of your hard work a waste. Whoops...
Since we're not drinking soda anymore we're always on the lookout for a healthy beverage alternative. You know, sometimes you're just not in the mood for water. :0) Lemon balm tea just fits the bill.
I'm linking this post to Simple Lives Thursday.
Wednesday, November 2, 2011
Herb Drying Rack
I love to grow herbs and try to add one or two new ones every year. I turn my basil into pesto, which gets frozen. The rosemary and parsley gets dug up, potted and brought in for the winter. The lemon balm gets boiled into tea concentrate and frozen to drink all winter. But, the rest of them need to be preserved for winter another way. Since I haven't delved into the whole flavored vinegar thing yet, that means they need to be dried.
Last year I only had one bundle of thyme and a couple of sage to dry. This wasn't a big deal to find space for. But, this year I have a lot more herbs that need to be dried and I needed someplace to hang them. So, the wheels got to churnin' and I came up with a plan that was executed with the help of my hubby.
I found this large canvas picture at Goodwill for $8.95 and thought it would be just the thing I needed for my project.
The first thing I did was take the canvas picture out of the frame and pop the name tag off of the bottom of the frame. Then I filled in holes with putty and gave it a light sanding. Next came a coat of spray paint. The weather turned cold and rainy and delayed my spray paint efforts. Then my hubby took over.
He finished painting the frame for me and then stapled chicken wire on the back. The last thing he needed to do was hang it in the kitchen for me.
All I had to do was gather my herbs in bundles with little clear rubber bands (that I bought in the hair department) and hang from the chicken wire with little "S" hooks. Here's what it looks like after it's make-over.
You can see the chicken wire up close.
I still have a bunch more herbs that need to be cut and bundled, but am out of room. I think I might try my hand at drying them in the oven and see how that turns out. Of coarse I do have room to add a couple more smaller drying frames on each side of the large one. I'll let you know what I decide. :0)
Pam
Last year I only had one bundle of thyme and a couple of sage to dry. This wasn't a big deal to find space for. But, this year I have a lot more herbs that need to be dried and I needed someplace to hang them. So, the wheels got to churnin' and I came up with a plan that was executed with the help of my hubby.
I found this large canvas picture at Goodwill for $8.95 and thought it would be just the thing I needed for my project.
The first thing I did was take the canvas picture out of the frame and pop the name tag off of the bottom of the frame. Then I filled in holes with putty and gave it a light sanding. Next came a coat of spray paint. The weather turned cold and rainy and delayed my spray paint efforts. Then my hubby took over.
He finished painting the frame for me and then stapled chicken wire on the back. The last thing he needed to do was hang it in the kitchen for me.
All I had to do was gather my herbs in bundles with little clear rubber bands (that I bought in the hair department) and hang from the chicken wire with little "S" hooks. Here's what it looks like after it's make-over.
You can see the chicken wire up close.
I still have a bunch more herbs that need to be cut and bundled, but am out of room. I think I might try my hand at drying them in the oven and see how that turns out. Of coarse I do have room to add a couple more smaller drying frames on each side of the large one. I'll let you know what I decide. :0)
Pam
Subscribe to:
Posts (Atom)